Steady NTbackup Exe Recovery, Promised
It is advised to follow the steps that the Backup repair Wizard indicates to perform the perfect and complete NTbackup EXE recovery. The steps and indications that the NTbackup recovery tool exhibits are simple to understand so there will be no mess with the execution and the steps will be in following order.
Step 1
First, install the software setup and launch the software in your system; to run the software
Go to Start » All programs » BKF Repair tool » BKF Recovery tool
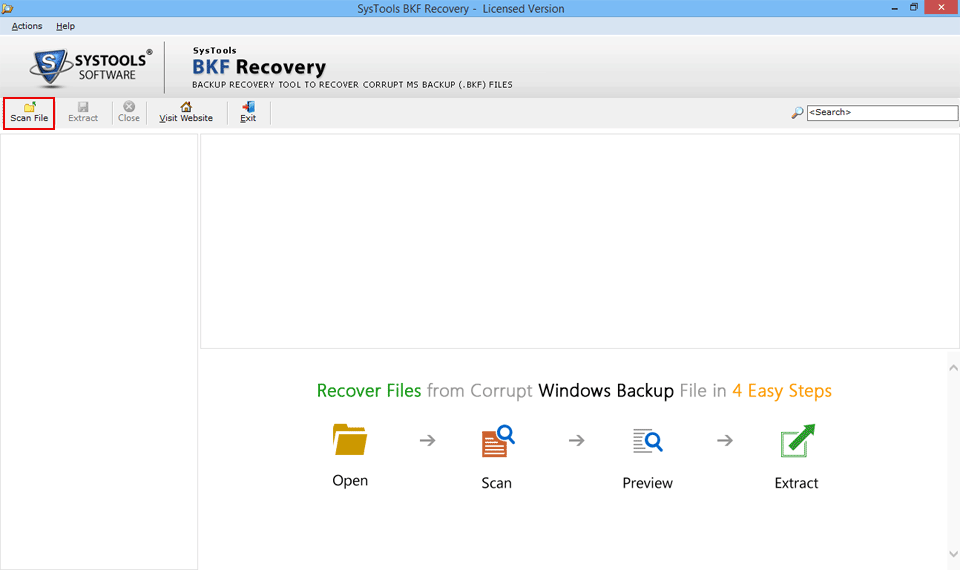
Following screen will appear as you launch the software
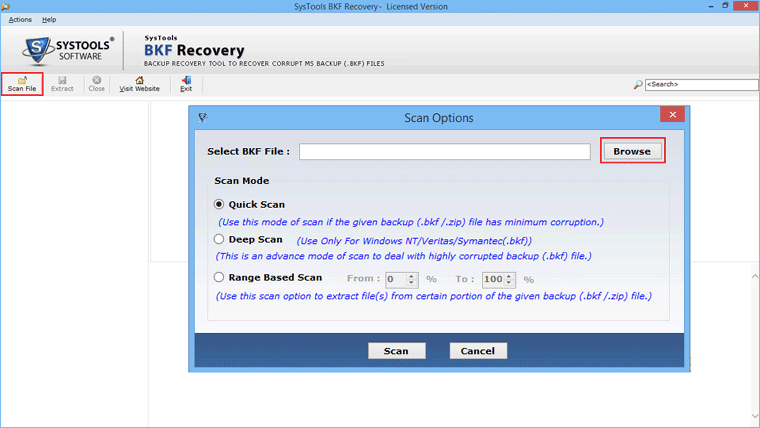
STEP 2
Browse to select the file to repair.
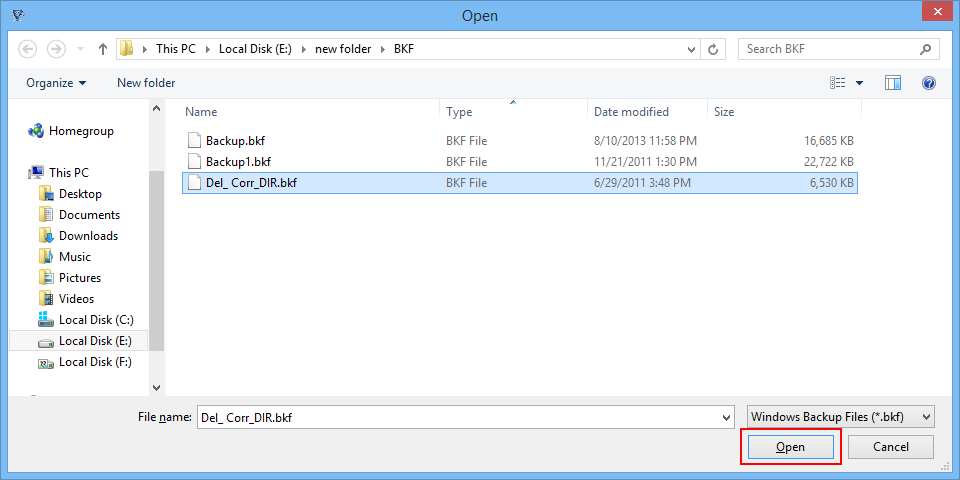
STEP 3
Select BKF file.
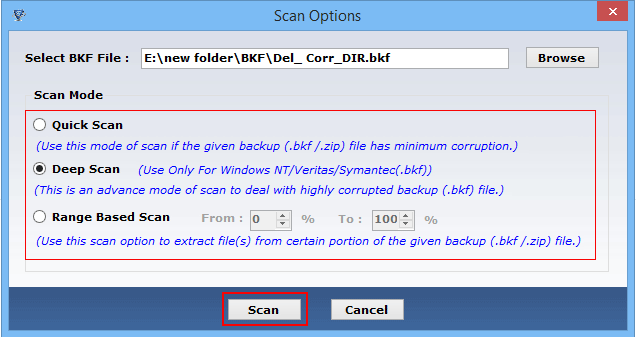
STEP 4
Moving next, click on the scan BKF button and the following window pop up with three separate scanning options.
STEP 5
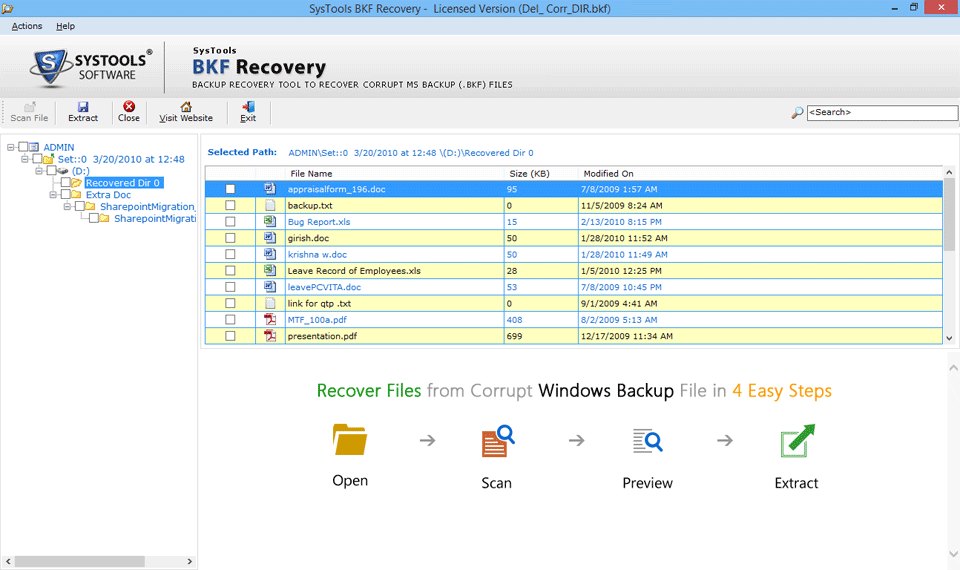
As the scanning completes, you can expand the recovered file with a tree like structure and can see the complete folder hierarchy. Aslo, you can view the single file by selecting and right clicking on it.
STEP 6
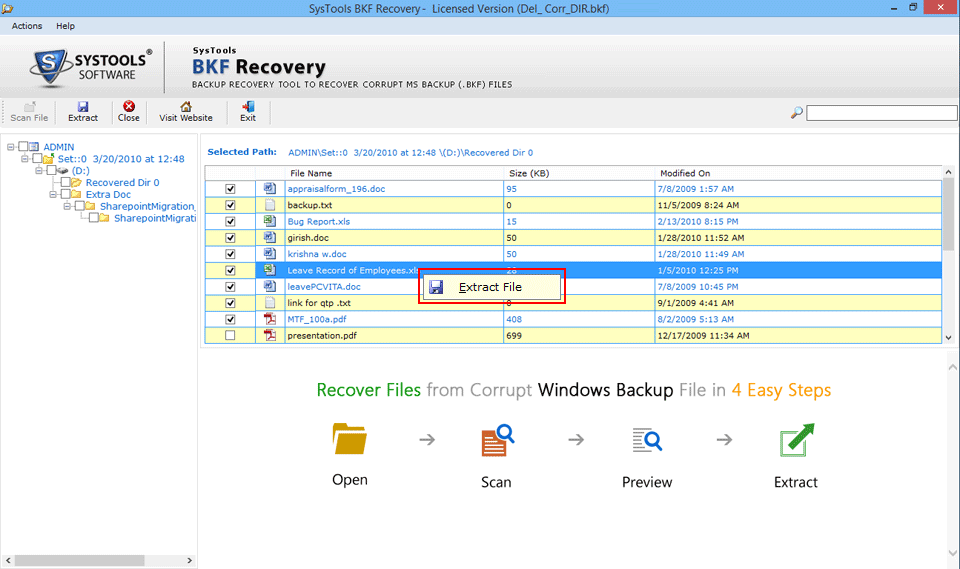
Also, if you wish to extract any single file then also you can right click on that file and select extract file option.
STEP 7
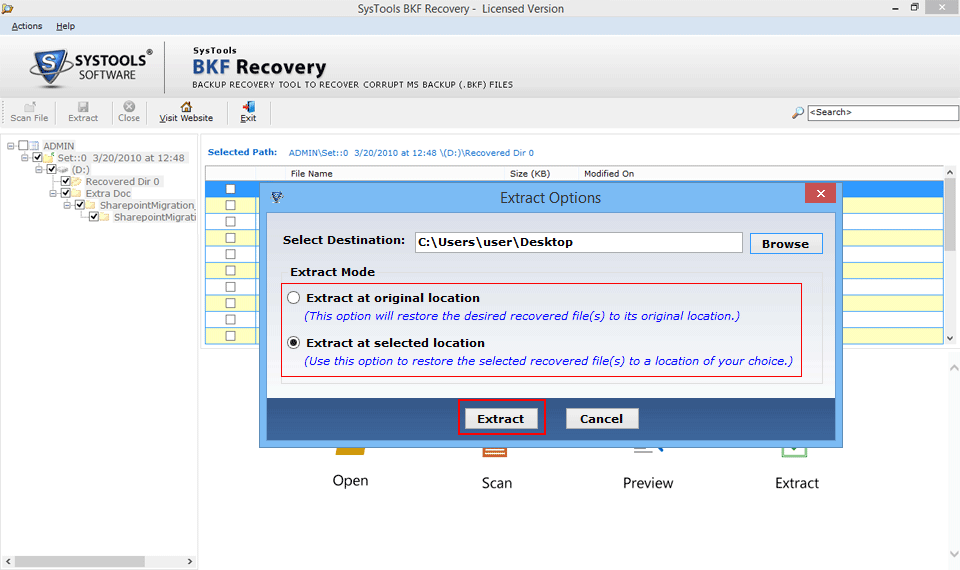
To exract entire BKF file data simply click on the Extract Button on top menu. The following screen appear from where select the location to save the file and choose the mode of extraction then click extract to save the file.
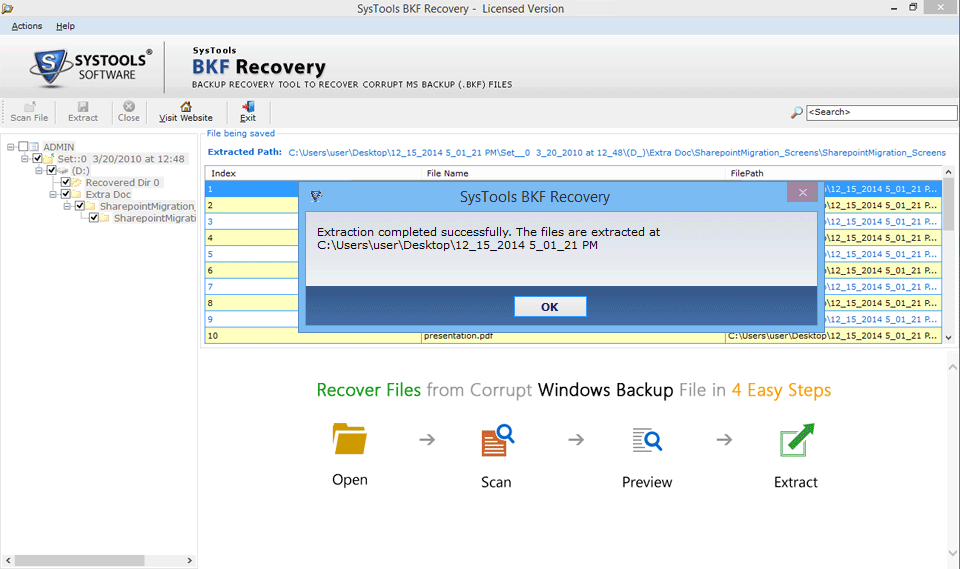
STEP 8
As the extraction completes, the following message appear with the path of extracted BKF file.